Building an electric guitar from scratch
My journey after joining a guitar building group at my local Makerspace MakeICT.
Due to the number of tools required I highly recommend you seek out a local maker space so you can get access to tools without needing to buy everything.
Before we get into the how-to, take a look at the final result! Keep reading to see how I got there and keep in mind that when I started this project I had no idea how to complete it as I have never done anything like this before. That means you can do this too.
The post is broken up into these sections:

Guitar Blueprint
There are several online resources where you can find electric guitar plans. The design I chose was a BC Rich Warlock style and I found it on this site: Electric Herald.
The site offers several free templates you can use, but I ended up spending $10 for the design I ended up going with. You’ll get a PDF and DXF file of the plans. The DXF was handy to import into Lightburn, which I used with the laser cutter/engraver I had access to at my local maker space.
Before we dive into it you need to be aware that the scale, which is the distance between the nut (top end of the fret board) and the bridge placement is important for the tone. If you’re reading this as someone with more experience in this area it’ll sound obvious, but it wasn’t to me when I started on this journey. The scale for the guitar I built is 25.5” and using the laser cutter to engrave everything in just the right place without needing to measure anything made getting started a lot easier.
Tools used
Band saw
Table and hand held router
Oscillating multi-tool
Fret saw (thin saw blade, 18 TPI)
Soldering iron
Power drill / drill press
Forstener Drill Bits
Screw driver
Planer (to get the wood from 2” down to 1.75”)
Power Sander
Rubber Mallet (to get fret wires into the fret board)
Metal file (to smooth our fret wires along the sides)
(optional) Laser Cutter (used to engrave shape & cut acrylic router templates)
(optional) 3D printer (to print control cover on the back of the body)
Materials
| Item | Type | Links to Parts | Cost |
|---|---|---|---|
| Body or body blank | Body & body hardware | 19x24x4 White Pine Timber | $80 |
| Neck or Neck blank | Neck & neck hardware | Used the same piece of wood bought for the body | 0 |
| Pickup(s) | Electronics | Wilkinson M Series Humbucker Pickups | $35 |
| Bridge/s | Body & body hardware | Horidon 65mm Hardtail Bridge | $6.37 |
| Pickup selector | Electronics | SALECOM 3 Way toggle ON ON ON | $9.59 |
| Electric Wiring | Electronics | Vintage-style Pushback Guitar Wire | $8.99 |
| Volume / Tone Control | Electronics | 2 x Fender 500K Potentiometer | $14.98 (7.49 ea) |
| Control Knobs | Body & body hardware | KAISH 2pcs (25mm) Aluminium Potentiometer Knobs | $9.99 |
| Output Jack | Body & body hardware | KAISH 6.35mm Jack with 3 Pins Chrome | $9.59 |
| Strap buttons | Body & body hardware | Jim Dunlop Strap Lock | $9.99 |
| Control Cover | Body & body hardware | I ended up 3D printing my own cover | |
| Humbucker Pickup Mounting Frame | Body & body hardware | Dopro Set 2 Plastic Humbucker Pickup Mounting Frame | $8.99 |
| String Tree | Body & body hardware | (optional) 5 sets Electric Guitar String Trees | $7.99 |
| Tuning Machines | Neck & neck hardware | Grover 305 Series Tuners 6-in-Line (Chrome) | $59.99 |
| Nut | Neck & neck hardware | Metallor 6 String Graphite Guitar Nut | $8.99 |
| Strings | Neck & neck hardware | D'Addario NYXL Electric Guitar Strings | $12.99 |
| Fret wire | Neck & neck hardware | 48 piece fret wire | $9.99 |
| Truss Rod | Neck & neck hardware | 420mm Two Way Rod (2 pack) | $8.99 |
| Inlays | Neck & neck hardware | Twisted Snake | $20 |
| Fretboard | Neck & neck hardware | Variety of options for fretboard wood | $20-$40 |
| Total | ~$342 - $362 |
Process
Step 1 - Body Outline
The design I chose has the body and neck all in one piece. More commonly the neck is separate from the body and connected toward the end. This meant I needed a larger piece of wood to accommodate for the size of the whole guitar.
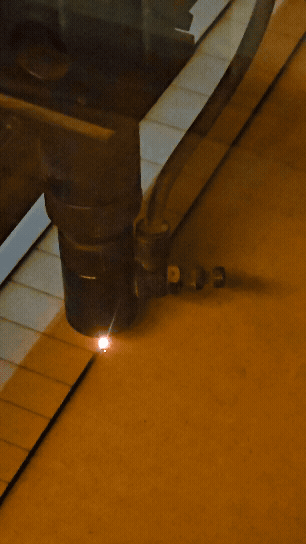
I took the DXF file from the blueprints that I downloaded from Electric Herald and since I had access to a large laser cutter I used it to engrave the wood with the outline of the guitar to then use the bandsaw and router to cut out the shape.
Once the rough body shape was cut I send it through the planer because the wood was 2” thick, but the ideal guitar body thickness is around 1.75”.

Cut body with a band saw using laser engraved outline as a guide
Step 2 - Body Control Cavities
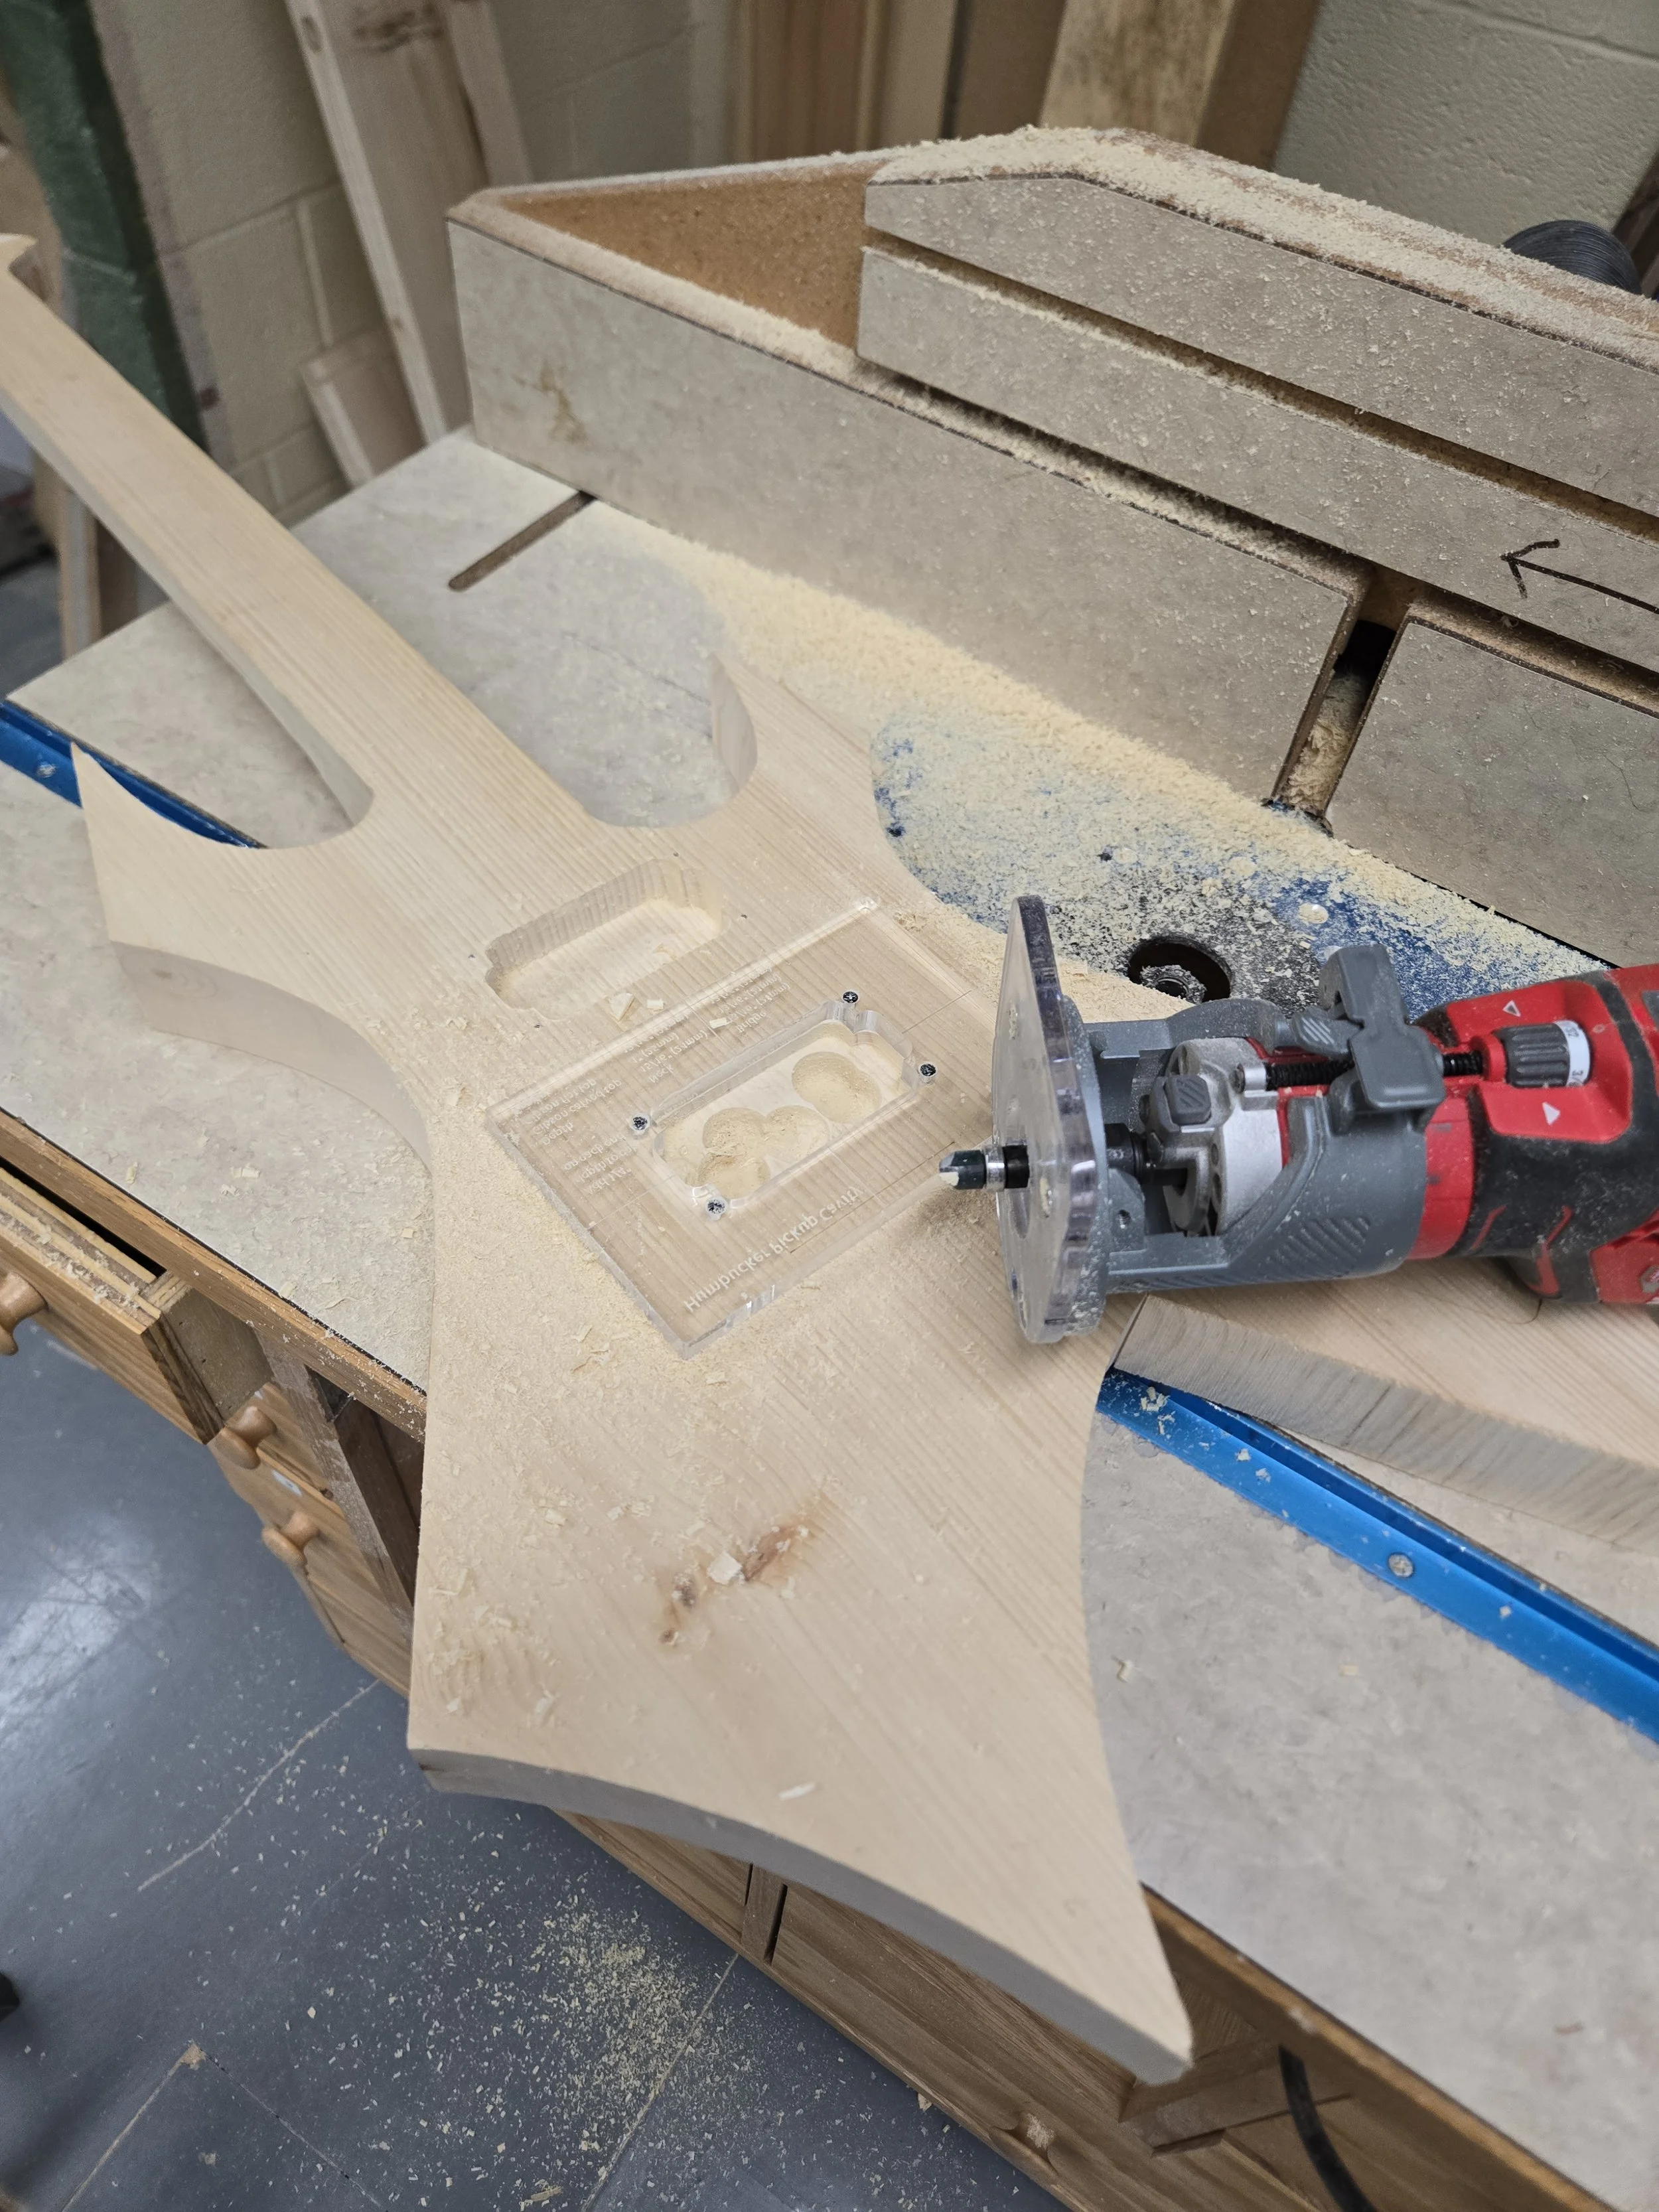
To get the cavities for the pickups and the controls just right I used the laser to cut router templates out of acrylic sheets, but you can use other materials as well. The acrylic sheets can be bought at any hardware store and should ideally be 1/4” thick or more.
With that said, if you don’t have access to a laser you can also freestyle it and do most of the work with forstener bits. Make sure you measure the depth you need for your pickups and be careful not too go too deep.
Use forstener bits with a drill press to get as much material removed as possible before going in with your router to smooth it out. To give the body shape a nice finish I put rounded edges using the table router.
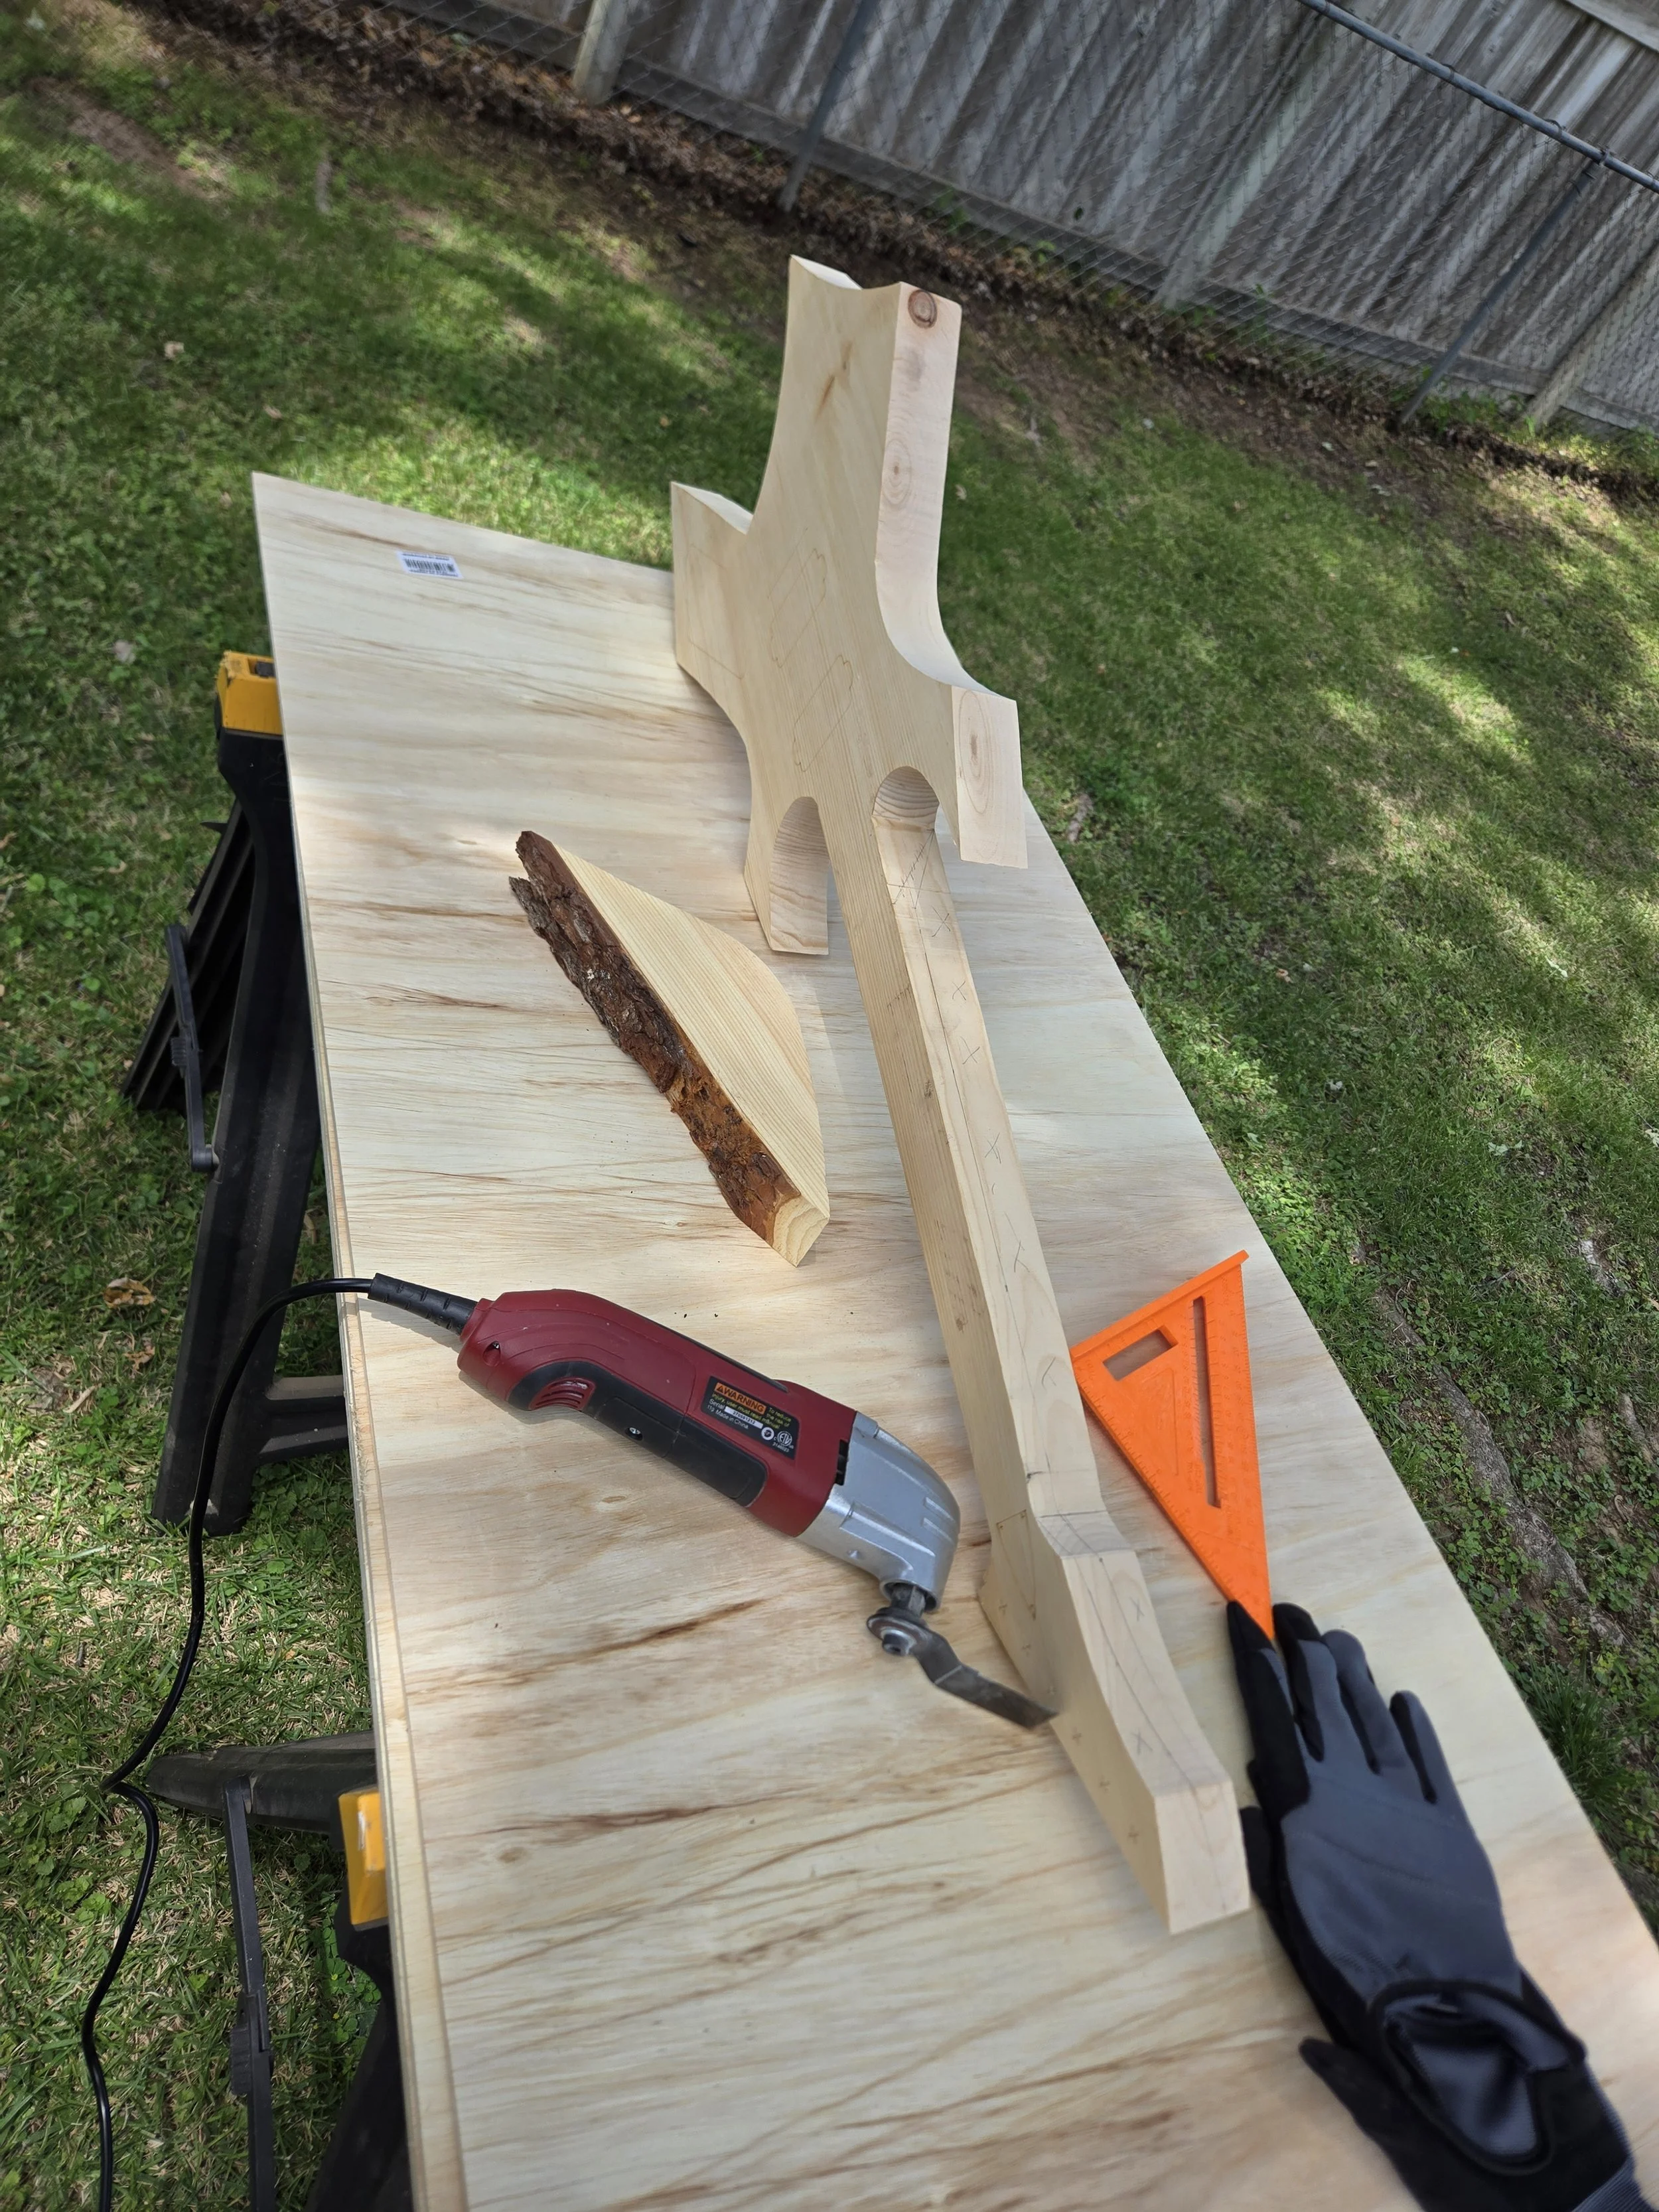
To get the neck to the right thickness I used an oscillating multi-tool to essentially cut that thickness in half and then used a handheld power sander to make it even and to round the edges since it was difficult to get there with the router.
One additional thing you’ll need to do to the neck is to cut a groove on the front to have enough space to install the truss rod. It’s needed to prevent the wood from bending over time under the tension of the strings. The 6th image below shows the body with the truss rod installed as I was applying Tung Oil as the final finish for the wood.


Step 3 - Fretboard
I had access to some wood that was almost the right size. I sent it through the planer to get the right thickness and then used the laser to cut the shape and engrave the lines for the frets. Much easier that way than having to measure the distance manually for everything.
In the end I needed to buy a “special” fret saw with a thin blade (18TPI) in order to get the groves deep enough and not too wide to get the fret wires installed. That process took quite a while, but well worth it in the end.
Cut the grooves and use a rubber mallet to hammer in the fret wires. If the fretboard is too thin it may break so make sure you check how deep the fret wires will go before thinning your fret board.
For the finishing touch, after I installed everything, I put stickers on the board that look like inlays.


Step 4 - Assembly & wiring
To connect the pickups to the control cavity use a long drill bit and feed the wire from the pickups through. Make sure you put the fret pickup by the fret and the bridge pickup by the bridge. They will be labeled. Mine had a B for bridge and F for fret on the back.
To wire it all together I used the wiring diagram depicted in the image. It’s fairly straight forward and if your humbuckers have 4 wires then the 2 not depicted in this image aren’t used and you can terminate them by connecting them to each other per humbucker. There are loads of other diagrams so feel free to look around if this doesn’t make sense.
After I wired it all together I glued on the fret board, put on the control knobs and fastened the humbuckers in place. After the fret board was installed the last piece of the puzzle before stringing the guitar was to install the nut. I was under the false impression that the tension of the strings will hold it in place, which was not the case, and I ended up using some super glue to keep it in place.
All that was left after that were the strings and a test run and it actually works! 😃


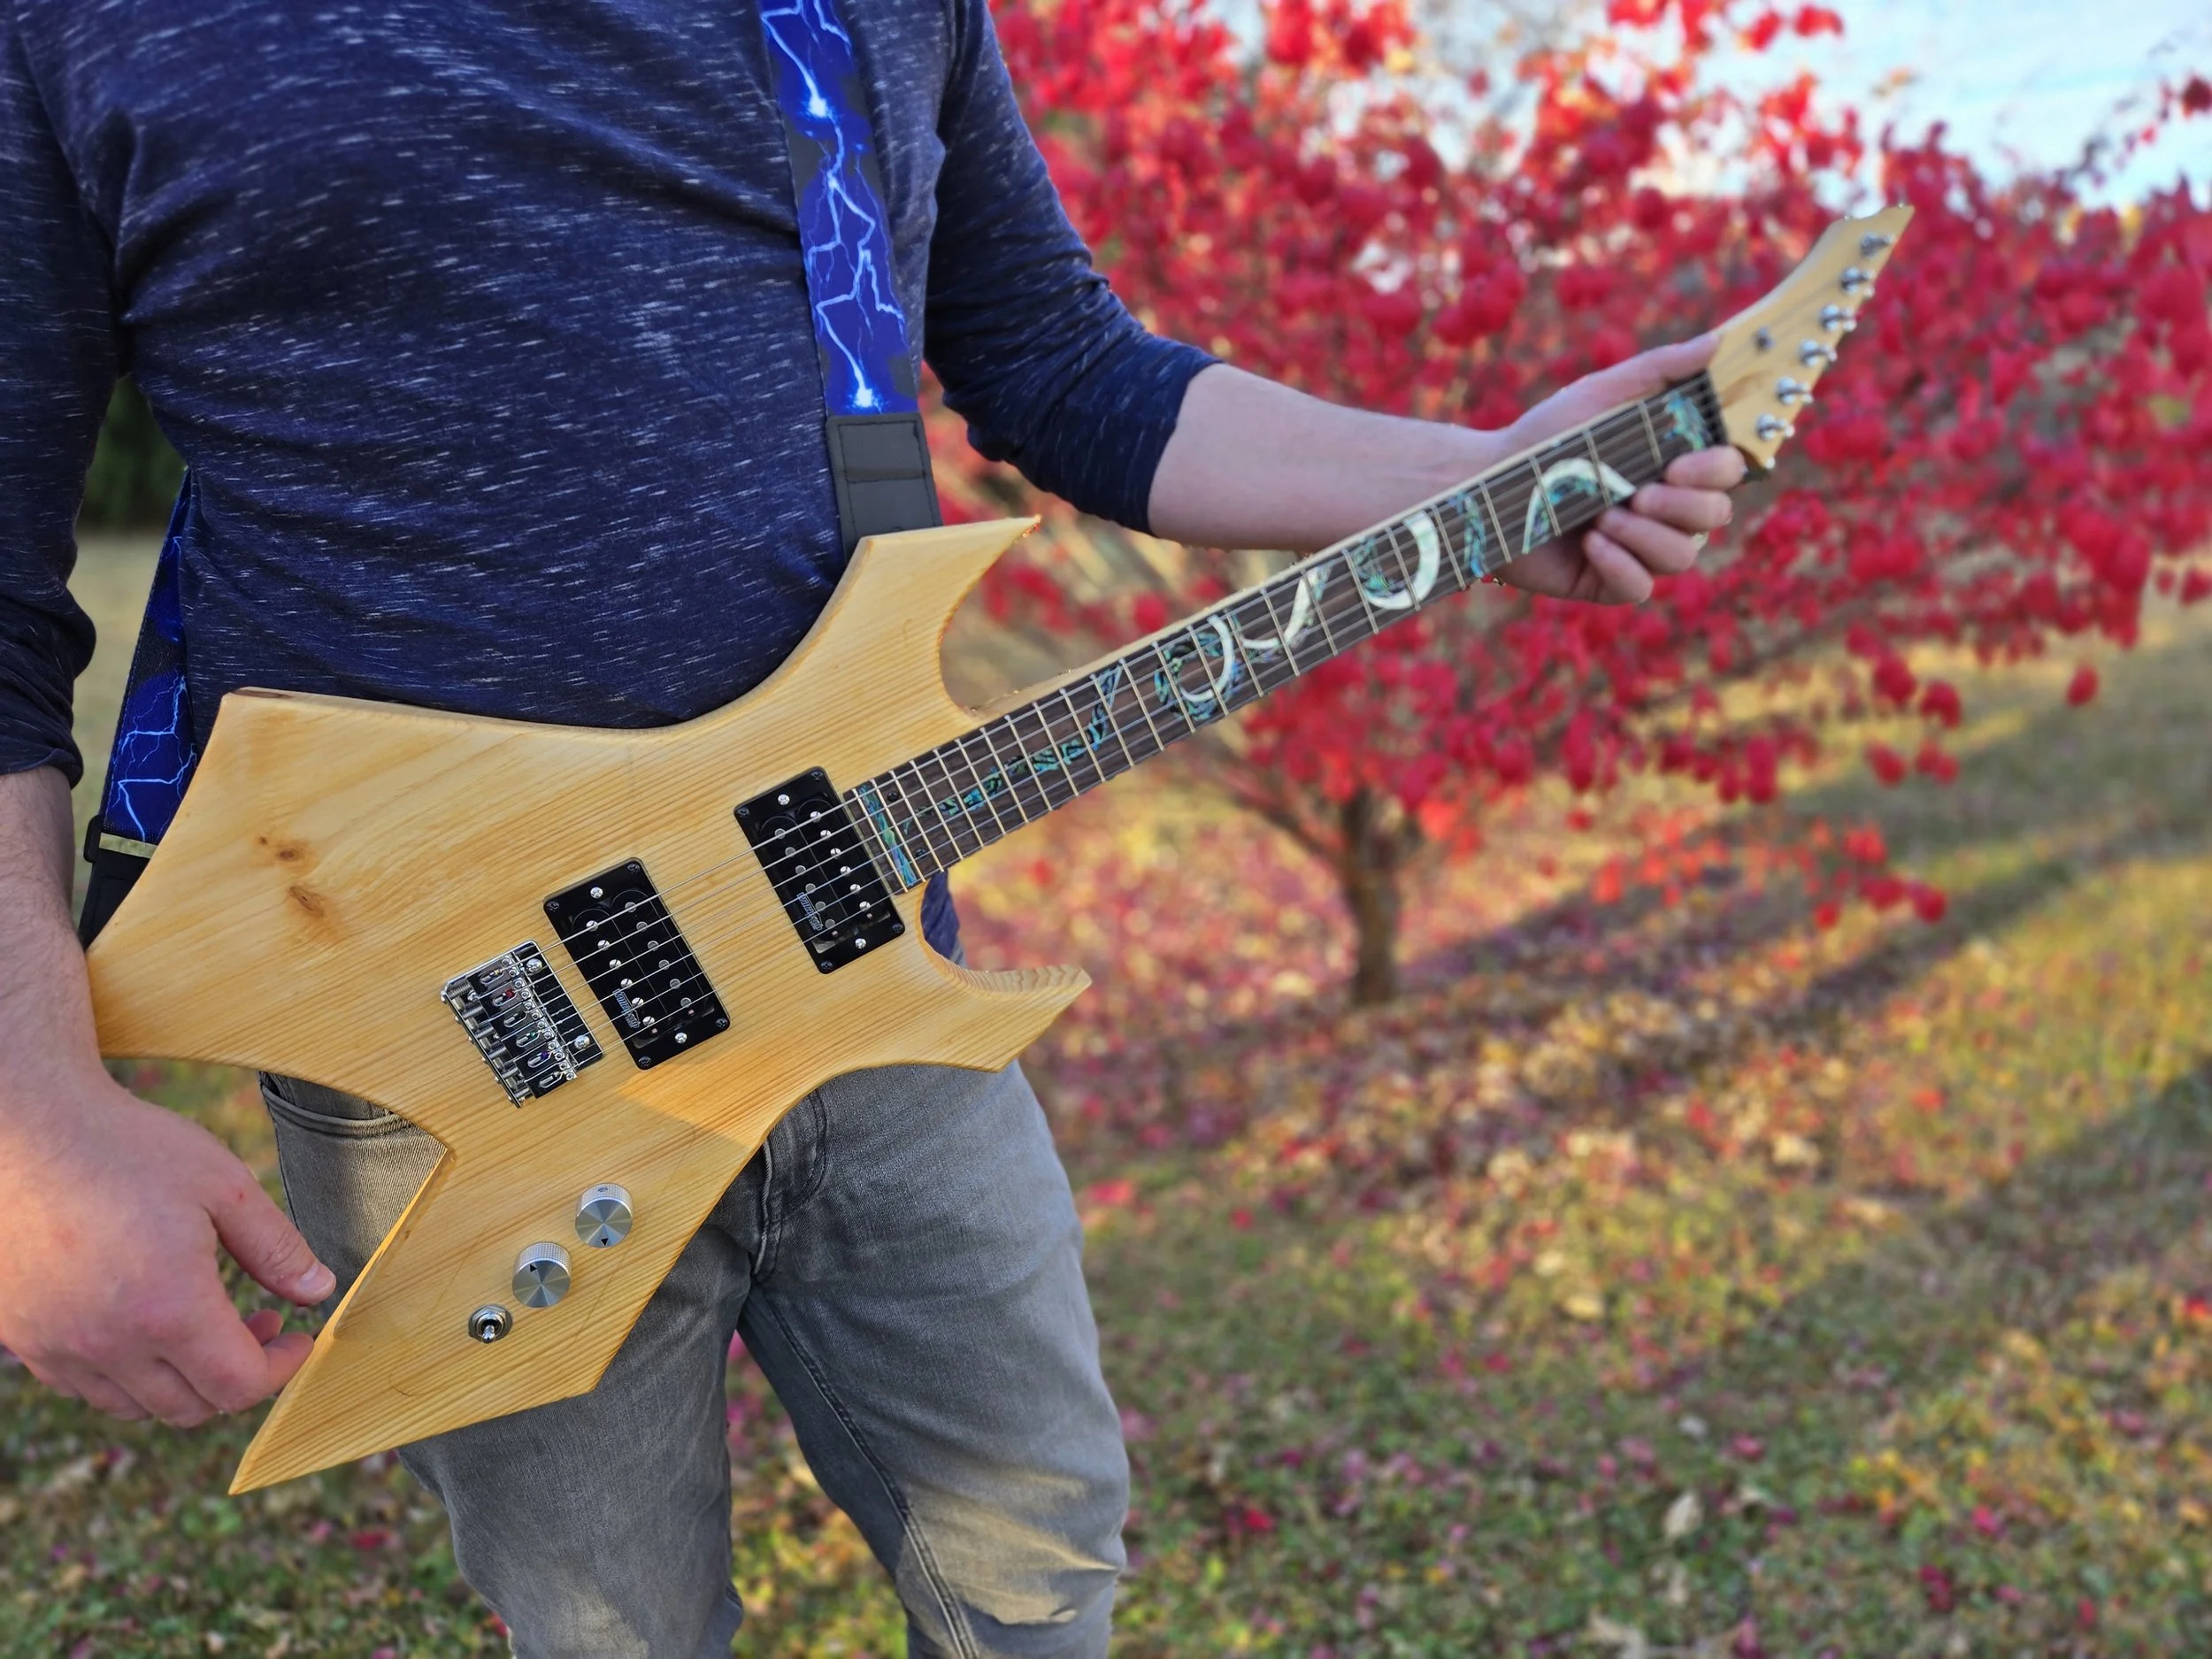
Pretty decent end result!!!